Today we continue our blog series that focuses on seamless Passwordless Single Sign On Integration for Native apps (powered by Hypergate Authenticator). Today we are going to cover the AD FS configuration for Salesforce.com. Over the comming weeks we will cover:
- Service Now
- Salesforce
- Atlassian Products (Jira, Confluence etc.)
- Slack
- Zendesk
- SAP Products (Fiori, Concur etc.)
Overview
Salesforce.com is one of the leading CRM platform providers worldwide. Their aim is to bring companies and customers together in one integrated CRM platform to reduce friction between departments and increase efficiency as well as customer satisfaction. To increase productivity and security even more, let’s have a look how to active passwordless single sign on for their native applications.
Prerequisites
- Hypergate Authenticator for iOS or Android
- Microsoft AD with AD FS configured
End User Experience
The goal is to have the best possible user experience on the mobile. At the end of this guide, your user will be able to use the application without the need to enter any credentials. The following video shows you what the user experience looks like on a newly enrolled mobile device (the app has never been opened before):
Configuration Salesforce.com
To be able to integrate Salesforce with AD FS, we first have to set a custom domain name for our application. This can be done in the My Domain:
- Click on Settings
- In the newly opened tab use the Quick Find field and search for My Domain
- Set a Domain and wait a few Minutes
- We now should be able to find Single Sign-on Settings in the Quick Find search
- There we click on New from Metadata URL and enter the FederationMetadata URL of our ADFS, this should look like the following URL: https://your-adfs-domain.com/FederationMetadata/2007-06/FederationMetadata.xml
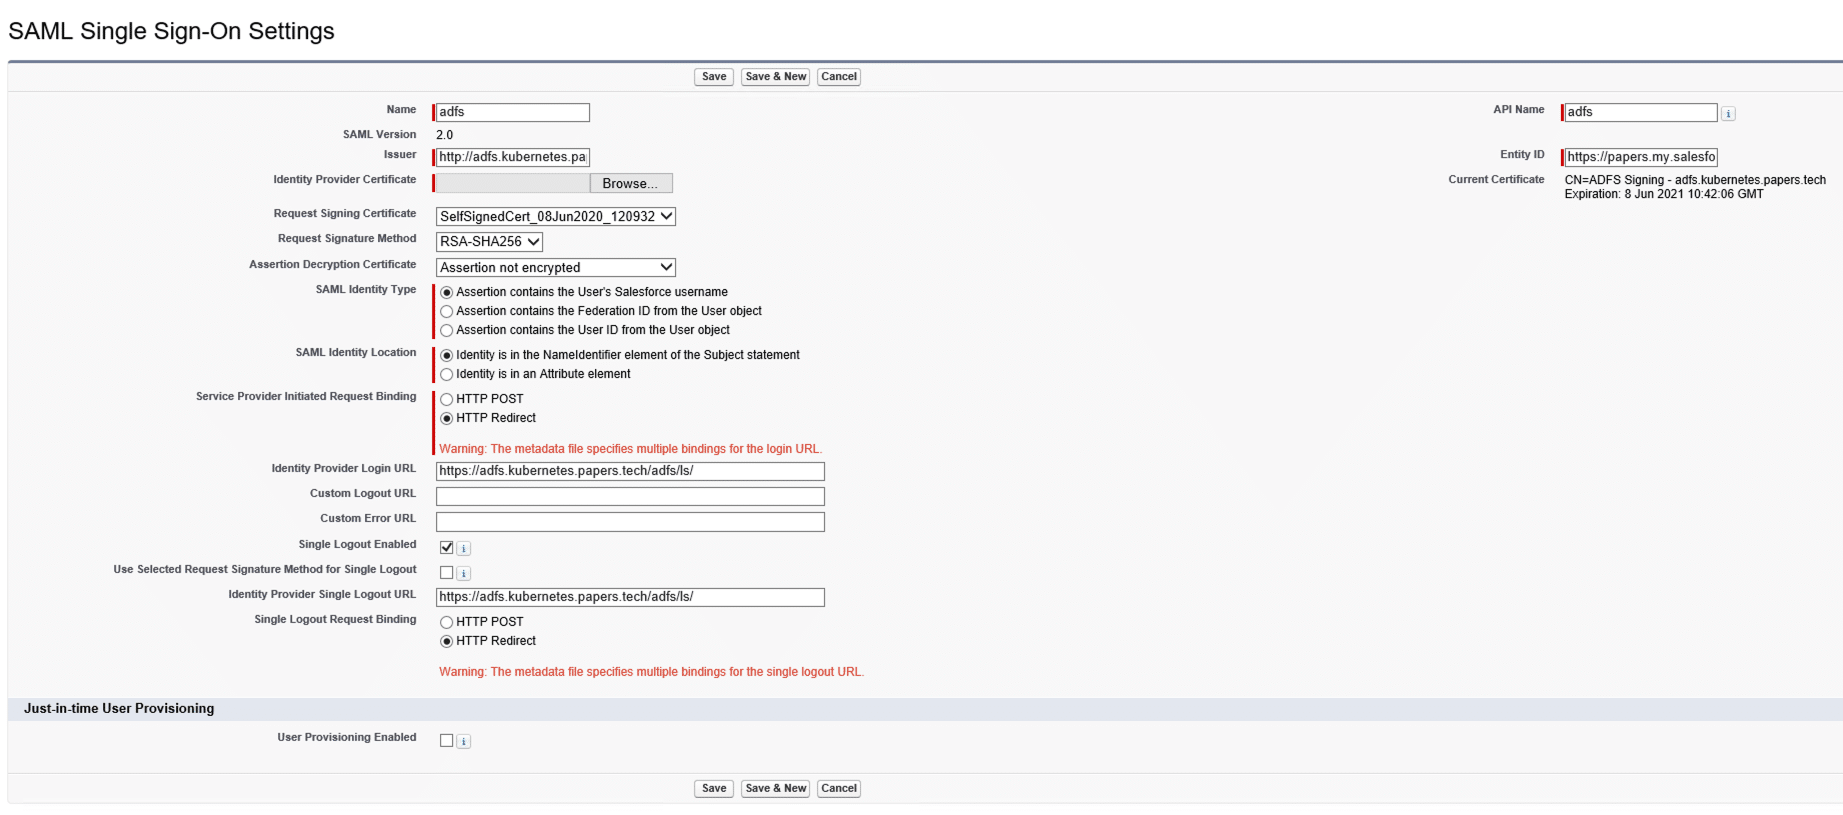
- This should bring us to the following screen:

- As Salesforce is using SHA-1 to sign SAML requests and AD FS uses SHA_256 by default the only thing we have to adjust is the Request Signature Method that has to be set to RSA-SHA-1, everything else should be correct out of the box.
- We then click on Save, we should now see our newly added SAML Setting.
The only thing left is to download the metadata.xml file. This can be done by clicking on the Name and press the Button Download Metadata. We will need it later when configuring AD FS.
AD FS
On the AD FS side we need to add a new Relying Party Trust. Just follow these steps:
- Open the Server Manager
- Click on Tools and open the AD FS Management
- In the Management Console right click on Relying Party Trusts and select Add Relying Party Trust…
- The Wizard should start, select Claim aware and click on Start
- Select Import data about the relying part from a file and select the previously saved metadata.xml and click on Next
- Fill in a display name
- Leave the Access Control Policy with Permit everyone
- Confirm the configuration by clicking Next and finish the Wizard
To finish the configuration, we need to:
- Right click on the newly created Relaying Party Trust
- Select Edit Claim Issuance Policy…
- Click on Add a Rule…
- Select Send LDAP Attributes as a Claim as template
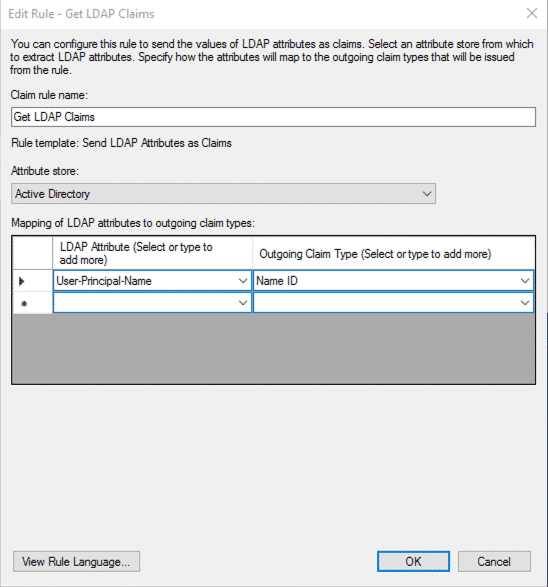
- Enter the following details:
- Set the Claim rule Name to Get LDAP Claims
- Set the Attribute Store to Active Directory
- Add a new row to the Mapping and set User-Principal-Name to Name ID

- Confirm the configuration with OK
- Because of Salesforce using SHA-1 we have to adjust the hash algorithm configured for the relying party. To do so, right click the Relying Party Trust and click on Properties.
- Switch to the Advanced tab and select SHA-1 as secure hash algorithm:
The AD FS configuration is now done.
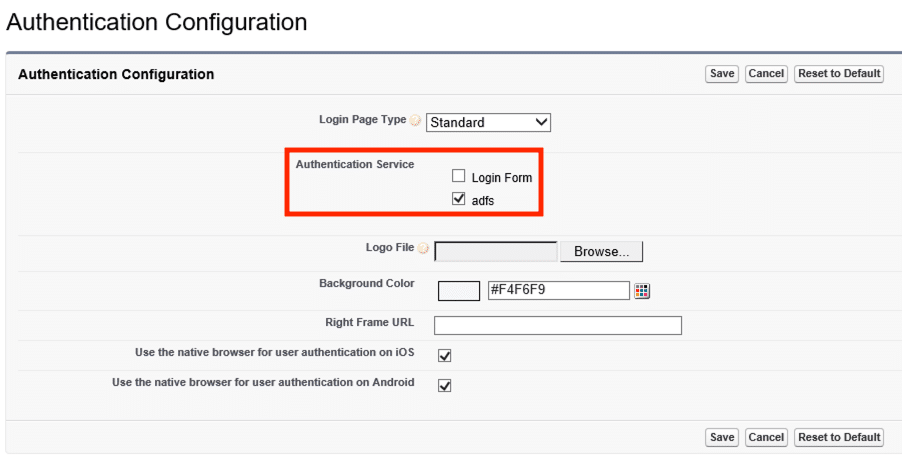
Activate Authentication Service on Salesforce.com
After the successful configuration of the AD FS, we can now enable our Authentication Service. Assuing we are still in the settings overview, open the My Domain configuration one more time. This time we are interested in the Authentication Configuration, just click on Edit. Enable your newly created Authentication Service (adfs on the screenshot) and save:
Mobile Configuration
The only thing remaining is to preconfigure the Salesforce app for our Tenant. This can be done with a managed confguration:
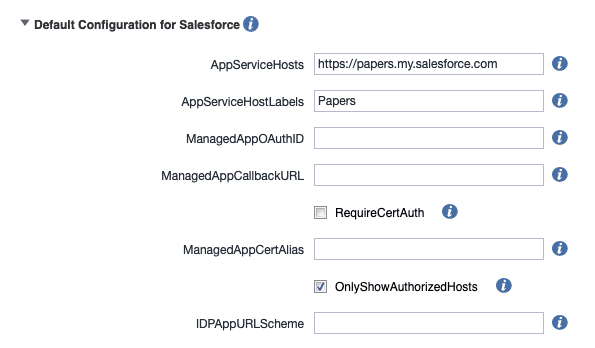
- AppServiceHosts: Your tennant URL you defined in the first step
- AppServiceHostLabels: The label dispalyed to the user
- OnlyShowAuthorizedHosts: Only allow login into the in AppServiceHosts defined instances